Thursday, January 2, 2014

Avocado Pancakes


Avocado...pancakes? Yes. These were definitely an experiment, but one that turned out very well! They were Dave's idea, and a very good one! We made these last summer and paired them with fresh tomatoes from my backyard. Yum.

Pancakes:

3 eggs
3/4 cup milk
1 avocado; cut into chunks
zest of 1 lime
juice of 1 lime
2 tablespoons butter; melted
1 cup cornmeal
1/4 cup all purpose flour
1 1/2 teaspoon of baking powder
1/4 teaspoon of salt

In a medium-sized bowl whisk the eggs and set aside.

In a blender puree the milk, avocado, lime zest, and lime juice until smooth. Add the puree to the egg along with the melted butter and stir to combine.

In a separate bowl whisk together the cornmeal, flour, baking powder, and salt. Add the dry ingredients to the wet ingredients and stir to combine. 

Heat a griddle to medium-high heat. Spoon 2 tablespoons of batter onto the griddle and smooth it into a round shape. Cook the pancakes for 3-4 minutes, flipping once, until both sides are golden brown.


Topping:

1 pint of cherry tomatoes; quartered
2 tablespoons of fresh cilantro; minced
1 tablespoon of apple cider vinegar
salt and pepper to taste

Combine ingredients above, and serve alongside or on top of pancakes. 

Sunday, December 22, 2013

Brownie Cut-Out Cookies: Christmas Version


I posted this recipe before as a Valentine's Day cookie, and this year decided I would try these as a Christmas cookie. As stated in my last post: these are cookies that taste like brownies, and they are amazing. Last time around I didn't spend the time to do nice frosting - I mean, you already have to roll out the dough and cut out the shapes, so also having to decorate the cookies makes the whole process take a few hours.

However, I have never done serious cookie decorating, so I figured I would give it a shot. I followed the instructions on this website. It's not overly difficult - you just have to get the frosting to the right consistency, and then you outline the frosting on your shape and fill it in. (According to the instructions you are supposed to have one consistency for detailing and one for flooding - but I used the same consistency for the outlining and the flooding.) At the end of the day, though, this can take quite a bit of time and I don't really think it's worth it. So, I did it once and had the experience, but we'll see if I will actually do it again!

Monday, July 29, 2013

Margarita Cupcakes


As is now par for the course, this post comes almost 3 months after actual cooking. Talk about procrastination. (Or, don't - wait until later.)

Anywho, my lovely friend Marisa's birthday coincides with Cinco de Mayo, so what better than to do a Mexican-themed party? (Her idea, not mine.) I of course volunteered to help with the culinary creations - guacamole, sangria, and margarita cupcakes (above). I've had this recipe sitting around for a while and have been waiting for the right moment to try it - and of course this was the perfect time. I wasn't sure how I would feel about tequila in/on a cupcake, but it was really tasty! Though it is long past Cinco de Mayo, these would still be a tasty summer treat if you can stand using your oven at this time of year :)


Cupcakes:

1½ cups all-purpose flour
1½ teaspoons baking powder
¼ teaspoon salt
½ cup unsalted butter, at room temperature
1 cup granulated sugar
2 eggs, at room temperature
Zest and juice of 1½ limes
2 tablespoons tequila
¼ teaspoon vanilla extract
½ cup buttermilk
1 to 2 tablespoons tequila (to brush)

1. Preheat the oven to 325 degrees F. Line a standard muffin tin with paper liners; set aside.

2. In a medium bowl, whisk together the flour, baking powder and salt; set aside.

3. In an electric mixer on medium-high speed, beat the butter and sugar together until pale, light, and fluffy (about 5 minutes).

4. Reduce the mixer speed to medium and add the eggs one at at time, mixing thoroughly after each addition.

5. Scrape the sides of the bowl and add the lime zest, lime juice, vanilla extract and tequila. Mix until combined. (The mixture may start to look curdled at this point, but don't worry, it will all come back together, power on!)

6. Reduce the mixer speed low. Add the dry ingredients in three batches, alternating with the buttermilk in two batches. Mix only until just incorporated, using a rubber spatula to give it one last mix by hand.

7. Divide the batter between the muffin cups. Bake for approximately 25 minutes or until just slightly golden and a skewer shows only moist crumbs attached, rotating the pan at the halfway point.

8. Allow cupcakes to cool for 5 to 10 minutes, and then remove to a cooling rack. Brush the tops of the cupcakes with the 1 to 2 tablespoons of tequila. Set the cupcakes aside to cool completely before frosting them.


Frosting:

1 cup unsalted butter, at room temperature
2¾ cups powdered sugar
1 tablespoon lime juice
2 tablespoons tequila
Pinch of coarse salt

9. To make the frosting, whip the butter on medium-high speed of an electric mixer using the whisk attachment for 5 minutes. Reduce the speed to medium-low, and gradually add the powdered sugar, mixing and scraping the sides of the bowl until all is incorporated. Give it a mix on medium speed for about 30 seconds. Add the lime juice, tequila and salt mix on medium-high speed until incorporated and fluffy. If the frosting appears a bit too soft, add some additional sugar, one spoonful at a time until desired consistency is reached. Frost cupcakes and garnish, if desired, with lime zest, an additional sprinkling of salt and a lime wedge.

Sunday, May 12, 2013

Roasted vegetables


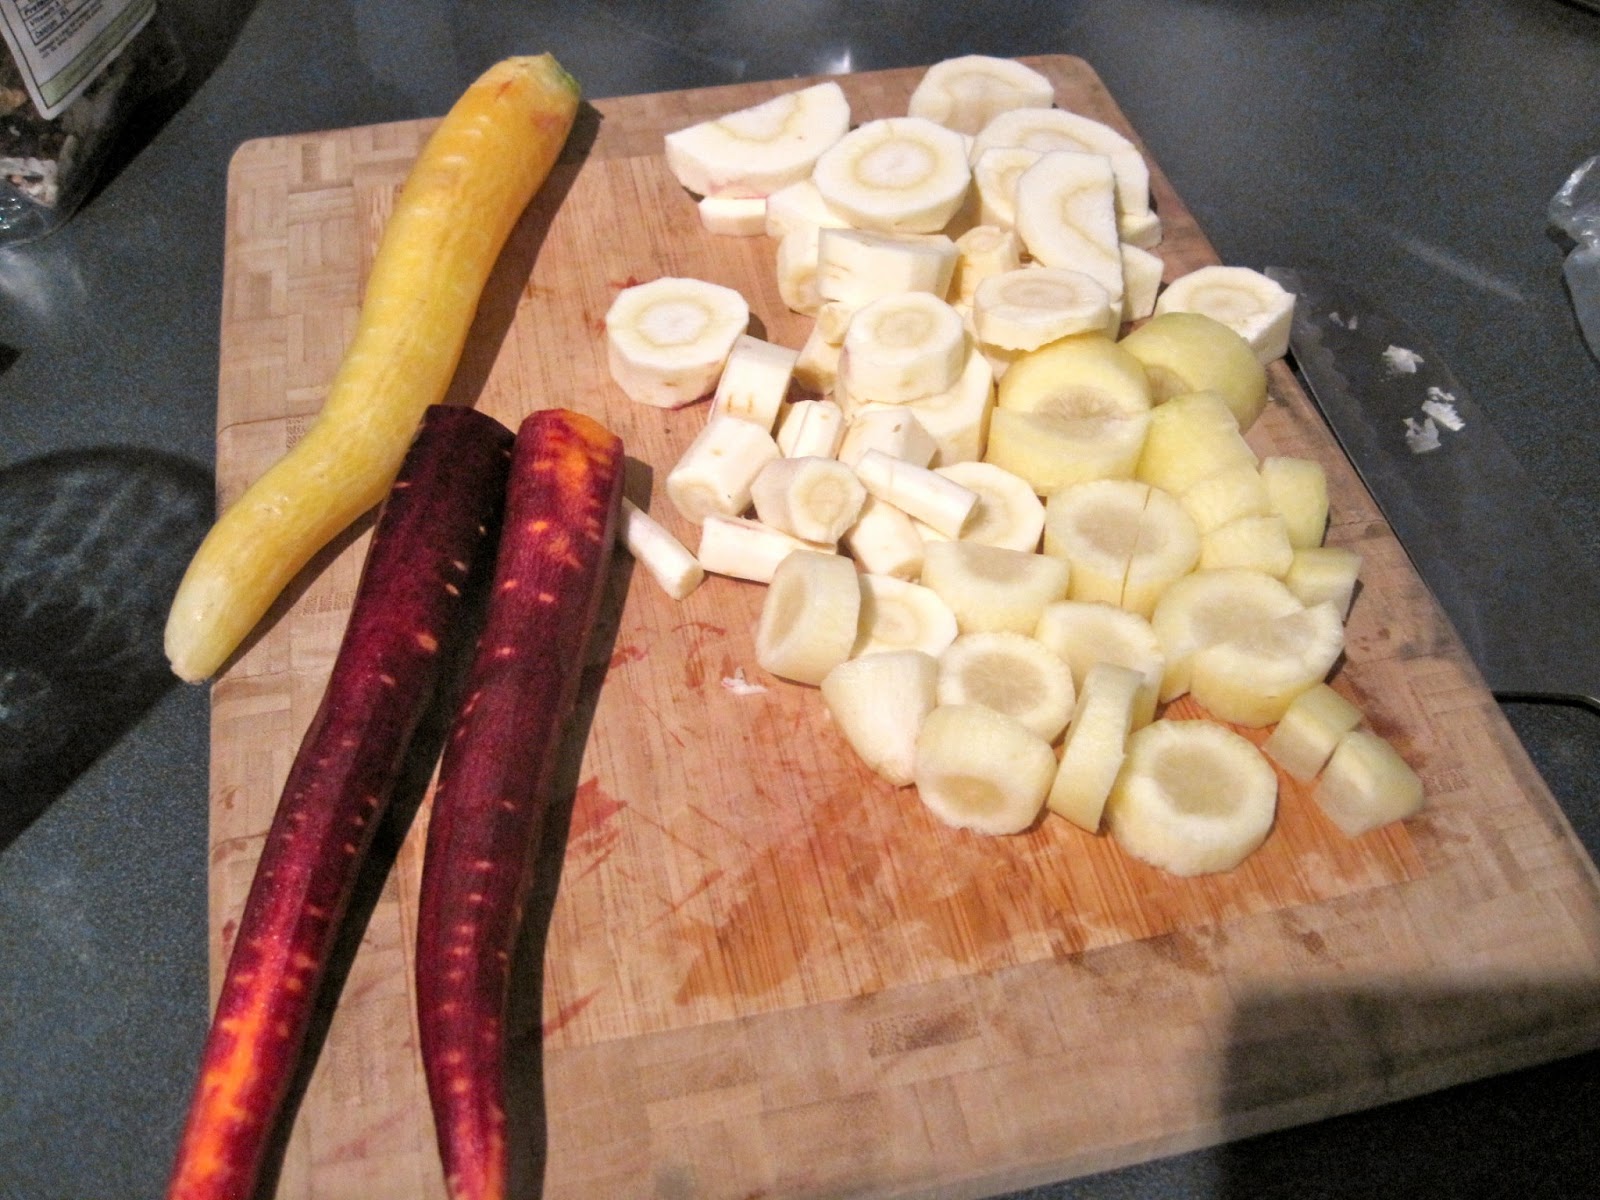
These photos are pretty old.....but I wanted to share my purple carrots (and white-ish/yellow ones?)! I love the farmers market in the winter - winter veggies are my favorite. And all you really need to do to eat them is chop them up, put some olive oil on them (maybe some rosemary), and stick them in the oven. Mmmm. The only thing I like about the winter. So glad it's spring.

Southwest Quinoa Salad


I have two recipes for southwest quinoa salad...no surprise, since it has many of my favorite foods. Yum. I went a little overboard with the herbs when I made this since I hate throwing away extra food, but, I'm going to tone it down a notch next time.

1 cup quinoa
1 3/4 cups water
1 teaspoon cumin
1 teaspoon kosher salt
1 teaspoon freshly ground black pepper
1/2 cup mint, roughly chopped
1/2 cup cilantro, roughly chopped
1 bunch green onions, thinly sliced
1 red pepper, diced
1 1/2 cups cooked black beans (or a 15 ounce can of beans, drained and rinsed)
1 cup corn kernels (fresh or canned)
1 large garlic clove, minced
1-2 juicy limes
1 tablespoon olive oil

Combine the quinoa, water, cumin, salt and pepper in a medium sized sauce pan and bring to a boil. Cover the pan and lower the heat to a simmer. Let cook until the quinoa is soft and water is absorbed, about 13-15 minutes. Remove from the heat and keep covered for 5 minutes. Uncover and let cool. The quinoa can be made a day ahead and kept in the fridge. Bring to room temperature before proceeding.

Place the quinoa in a large serving bowl. Add the mint, cilantro, onions, red pepper, beans, corn and garlic. Squeeze the juice of one lime in and drizzle in the olive oil. Stir gently, taste for additional lime juice, salt and pepper and add more if needed. Serve at room temperature.


Strawberry Spinach Salad


Love this time of the year, when you no longer have to cook everything you eat. This salad is really easy and delicious. I didn't follow the amounts exactly - but I had enough servings for 4 or 5 meals (obviously supplemented with other snacks).

½ cup dry wheat berries
1½ cups water
1 teaspoon Herbs de Provence
1 teaspoon kosher salt
1 Tablespoon olive oil

¼ cup olive oil
3 Tablespoons balsamic vinegar
1 Tablespoon honey
1 teaspoon Herbs de Provence
½ teaspoon kosher salt
¼ teaspoon black pepper

6 cups baby spinach leaves
1 cup fresh strawberries, sliced
¼ cup crumbled goat cheese (or more....)

In a small pot combine the wheat berries, water, herbs, olive oil, and salt. Bring to a boil and then cover with a lid and reduce to a simmer. Cook over low heat for 25-35 minutes or until all of the liquid has been absorbed and the wheat berries are tender. Remove the lid and allow the wheat berries to steam for 5 -10 minutes. Cool and set aside.

In a small bowl whisk together the olive oil, balsamic vinegar, honey, herbs and salt and pepper for the vinaigrette.

Toss together the cooled wheat berries, spinach, strawberries, and goat cheese. Serve with vinaigrette to taste.

Blueberry lemon bread


Well, it sure has been a while. My 2013 posting count is pretty abominable (2, as of May!). As usual, I blame it on the doggy. Anyway, I've decided to leave my commentary on these blog posts to a minimum, and focus on the food. No one wants to hear me whine about my poor blogging performance on every post. And, when I look at most food blogs, it annoys me that I have to scroll down a huge page full of blahblahblah by someone I don't know to get to the recipe I want to use. I finally got a new awesome-sauce camera that makes me more excited about taking food photos, so hopefully that will give me some incentive to post. Hooray, back to baking! (and cooking, I guess.)

1.5 cups of all purpose flour
1 tsp baking powder
1/2 tsp salt
1 stick butter (melted)
1/2-1 cup sugar (depending how sweet you want it)
1/4 cup of lemon juice
2 tbs lemon zest
2 eggs
2 tsp vanilla extract
1.5 cups of blueberries (I use frozen)
1/2 cup buttermilk (I use regular milk with a little bit of lemon juice)

Put everything in a bowl. Mix it up. (Maybe save the blueberries for last, and fold them in.) Scrape into a greased loaf pan. Bake at 350 for 50-60 minutes until a knife or toothpick comes out clean. Easy peasey. 

(If you want to do it the hard way, click here)

Thursday, January 3, 2013

Vegetarian Chili


This chili is very spicy, so you definitely need the yogurt! If you don't like spice, you can reduce the amount of chiles/sauce, or remove it altogether.


1 small butternut squash
3 tablespoons olive oil
1 medium onion, chopped
1 shallot, chopped
1 large green bell pepper, diced
1 15oz. can chickpeas, drained
1 26oz. can diced tomatoes
1 can tomato paste
1 cup water
1 tablespoon dried oregano
2 chipotle peppers in adobo sauce, finely chopped
2 tablespoons adobo sauce
salt and pepper, to taste

Serve With:
plain Greek yogurt


1. Preheat the oven to 400 degrees F. Peel and dice the butternut squash. Spread the pieces out on a baking sheet and toss with 2 tablespoons of the olive oil. Roast until tender and cooked through.
2. In a deep, large saucepan, saute the onion, shallots and green pepper in the remaining 1 tablespoon of olive oil, until they begin to caramelize.
3. Add the squash, chickpeas, chopped tomatoes, tomato paste, 1 cup of water, oregano, chipotle chiles, and chipotle sauce. Season with salt and pepper and simmer chili until cooked through. Add a little more water if it becomes too thick.
4. To serve, spoon chili into a bowl and top with a dollop of Greek yogurt.


Wednesday, January 2, 2013

Pasta with Squash, Brown Butter and Rosemary


I love butternut squash. I decided the other day that I could live on just fall produce - squash, sweet potatoes, pumpkin, apples, pears, beets, figs, parsnips.....the list goes on. I would miss blueberries and raspberries, but not a lot else.

I tried this dish because I wanted and easy recipe for comfort food. And this made the cut. The parmesean melted when I put it on top, and when eating leftovers, there were chunks of cheese that had congealed back together. Sounds gross, but YUM. This is a must-try for a cold winter day.

[I just went back to the original recipe and realized that Rachael Ray started her post with the same 4 words. That's just weird.]


3 lbs butternut squash – peeled, seeded and cut into 1/2-inch cubes
1 onion, chopped
2 1/2 tablespoons extra-virgin olive oil
1 1/2 tablespoons chopped rosemary
salt and pepper
1 lb box pasta
4 tablespoons butter
1 teaspoon fresh lemon juice
1 cup grated parmesan cheese
3 tablespoons pine nuts, toasted

Preheat the oven to 400°. In a large bowl, toss the squash, onion, olive oil and rosemary; season with salt and pepper. Place on a baking sheet and roast until the squash is tender, about 30 minutes.

Meanwhile, in a large pot of boiling, salted water, cook the pasta until al dente; drain and transfer to a large bowl.

In a small skillet, melt the butter over medium heat and cook, stirring occasionally, until golden, about 7 minutes. Stir in the lemon juice.

Add the roasted squash, brown butter and 1/3 cup parmesan to the pasta and toss; season with salt and pepper. Top with the pine nuts and remaining parmesan.

[Note: I increased the amount of pasta and cheese significantly from the original recipe. Didn't seem to make sense to me to use 3 pounds of squash with only 2/3 cup of pasta.]


Saturday, December 29, 2012

Christmas cookies


Well, I haven't gotten much cooking done in the months since getting my puppy, but I obviously had to make time for Christmas cookies. I found it works pretty well to schedule a party and set baking goals in order to actually get it done. Making five batches of cookies over the course of a week doesn't sound too difficult...but it was with the dog around and with general holiday stress! I tried a few new recipes, and used a few of my old favorites.

Chocolate Crackles

Ginger Molasses Cookies

Brown Sugar Cookies (I think I used this recipe...but sugar cookies are pretty basic anyway. Had to go with the brown sugar when I ran out of white sugar!)

Oatmeal Cinnamon Chip Cookies (these got the best reviews - even though I just used the recipe off of the cinnamon chip bag...)

Macaroons
2/3 cup all-purpose flour
14 oz package shredded coconut
¼ tsp salt
14 oz can sweetened condensed milk
2 tsp vanilla extract

Heat oven to 350 degrees. Combine the flour, coconut and salt, then stir in the sweetened condensed milk and vanilla until well blended. Place roughly golf ball size drops onto cookie sheet covered with parchment paper. Bake for 12-15 minutes.

Saturday, October 27, 2012

Whole Wheat Pasta Salad with Fried Kale, Tomatoes, Feta, and Pesto Vinaigrette


At the end of the summer I made a few great pasta salads - after I got the puppy and didn't have much time to cook. I had never actually cooked with kale before, and figured I should probably try it. I definitely don't LOVE kale like some people do, but don't hate it either. I mostly chose this recipe because I love pesto. Anything + pesto = deliciousness. This recipe makes a lot - good for a week of lunches!

8 oz. whole wheat pasta
6-8 oz. kale leaves, coarsely chopped
1 T olive oil (for stir-frying the kale)
1 cup cherry tomato halves
1/4 cup crumbled Feta (or more - as desired)

1 T lemon juice
2 T white wine vinegar
2-3 T pesto
2 T olive oil

Cook pasta according to directions on box. Drain pasta into a colander placed in the sink and let it drain well.

While the pasta cooks, chop up the kale leaves (cutting away the inner ribs if they're large), and wash in a salad spinner if needed. Heat the olive oil in a large non-stick frying pan, add the kale all at once, and stir-fry for 2-3 minutes until the kale has wilted and is starting to get tender. (It should still be a little chewy but not raw tasting.) Turn off pan and let the kale cool.

Mix together the lemon juice, white wine vinegar, and pesto, then whisk in the olive oil to make the dressing. (Start with 2 T pesto and then taste to see if you'd like to add the other tablespoon for more pesto flavor.)

When the pasta has drained well but is still warm, transfer it to a bowl and stir in about half the dressing. Let the pasta sit while you cut cherry tomatoes and crumble the feta.

Stir the cooled kale into the pasta in the bowl. Add the tomatoes and gently combine; then add more dressing as desired (depending on how moist you like your salads.) If you don't use all the dressing save it for drizzling over tomatoes or to perk up any leftover salad. Gently stir in the crumbled Feta, season salad to taste with salt and fresh-ground black pepper, and serve.


Peanut Butter Bars


This is embarrassingly old (from July), but an easy and delicious dessert recipe to try. I was being a major complainer at work and told my friends I would make them whatever they wanted, and this was their choice. Pretty good deal for me - was really easy and doesn't require the oven, which was great for the summertime! I think these kind of taste like Nutter Butters, but better, and VERY rich!


1 cup butter or margarine, melted
2 cups graham cracker crumbs
2 cups confectioners' sugar
1 cup peanut butter
1 1/2 cups semisweet chocolate chips
4 tablespoons peanut butter

In a medium bowl, mix together the butter or margarine, graham cracker crumbs, confectioners' sugar, and 1 cup peanut butter until well blended. Press evenly into the bottom of an ungreased 9x13 inch pan.
In a metal bowl over simmering water, or in the microwave, melt the chocolate chips with the peanut butter, stirring occasionally until smooth. Spread over the prepared crust. Refrigerate for at least one hour before cutting into squares.

Blueberry Coconut Oatmeal Pudding


Terrible photo, awesome recipe. Quick steel cut oats with coconut milk and blueberries. Mm mm mmm. Worth it even when blueberries are expensive (or you could use frozen). I skipped the rose water included in the original recipe, but if you can find it, might be worth a try! This actually makes quite a bit, so be ready to eat this for breakfast for a week or have for a snack/dessert frequently!


1 cup water
1/4 teaspoon salt
1 14-ounce can unsweetened low-fat coconut milk
2 to 4 tablespoons mild honey or agave nectar (to taste)
1 teaspoon vanilla extract
1 cup quick-cooking steel-cut oats
(1/2 teaspoon rose water - if you want it/can find it)
1 cup blueberries

1. Combine the water, salt, coconut milk, honey or agave nectar and vanilla in a large (3-quart) saucepan and bring to a boil. Stir in the oatmeal and bring back to a boil, stirring. Reduce the heat to low, cover and simmer 5 minutes, stirring occasionally. Stir in half the blueberries, cover, and cook another 5 minutes, until the oats are cooked and the mixture is creamy.

2. Stir in the rose water and the remaining blueberries. Turn off the heat, return the lid and let sit for 5 to 10 minutes. Serve right away, or spoon into serving dishes and allow to cool in the refrigerator.


Original recipe (nytimes)

Sunday, September 30, 2012

Southwestern Roasted Sweet Potato Salad


I love sweet potatoes. And black beans. And cumin. This was one of my first "fall-ish" recipes - and there will be many more to come. 


5-6 sweet potatoes, peeled and cut into 1 inch cubes, to make 8 cups
3 tablespoons melted olive oil
1 1/4 teaspoon sea salt
1 teaspoon freshly ground black pepper
2 teaspoons ground cumin
2 teaspoons dried oregano
1 15.5 oz can black beans, rinsed and drained)
1/2 cup thinly sliced red onion (about half a medium onion), or more to taste
1 1/2 to 2 cups grape tomatoes
1 cup feta cheese
1/2 cup finely chopped fresh cilantro leaves
1/4 cup extra virgin olive oil
1/4 cup lemon juice
1/2 - 1 teaspoon ground chipotle chili powder [original recipe says this is pertinent, but I used regular chili powder and it was still tasty]


Preheat oven to 400 degrees.

In a large bowl, toss the sweet potatoes with the olive oil. Sprinkle on the salt, pepper, cumin and oregano. Stir to coat. Spread the potatoes in a single layer on a baking sheet with an edge. Bake for 45-60 minutes, checking after 30 minutes as some ovens heat differently (no need to stir). Bake until the edges start to brown. (The goal is to slow roast them to caramelized perfection.) Cool.

Transfer the potatoes to a large serving bowl. Add the black beans, red onion, tomatoes, feta and cilantro.

In a small bowl combine the olive oil, lemon juice and chipotle pepper powder. Pour over the salad. Stir gently to combine all the ingredients.

Can be eaten right away, but it tastes best if it's had at least one hour to chill.


More excuses.


Well, this clearly hasn't been updated in a while. Oops. Not a good track record this summer. I've got lots of excuses..the most recent of which is that, I have a puppy! And of course that takes up quite a lot of my time. I can make it up to my [tiny] audience by posting a really cute photo?

I do have a backlog of recipes to post, but, I'm hoping to get back on the ball since it is now my favorite cooking season. It's time for soups, breads, pies....and, holiday cooking will come up before we know it.

I'd like to give this thing a makeover...and get a nice camera so my photos will look ten times better (currently most of mine come from my iPhone). I should also replace two lightbulbs that are out so I can actually get some good lighting...oops...

Anyway, I'm back, I hope. Fall resolution?


Thursday, July 5, 2012

Making chocolate!


Ever thought about making chocolate? Well, if you're in the Boston area, look no further!!

I saw a LivingSocial deal for this class at ChocoLee Chocolates and thought hey, could be fun! I got a friend to buy it with me last July, and she called in January to schedule a date in but they didn't have any openings until June!! So, we had this on our calendars for 6 months, and after almost a year we finally had the class, and it was a lot of fun! It's a 3 hour class on a Wednesday night or Saturday afternoon, and in our class we did chocolate almond bark, truffles, and filled chocolates. We mostly worked with dark chocolate - my favorite - so I really liked that part. You don't actually just work on your own chocolates - everyone works together and you can switch between different tasks as you want. So, if you don't want to chop a huge (HUGE) bar of chocolate, you don't have to. And you still come home with a LOT of really delicious creations!

I actually saw at least one other Groupon or LivingSocial for this class recently, so if you're interested, keep your eyes open for a good deal :)


Monday, July 2, 2012

Birthday dinner #2: Oaxacan Tlayuda with Guacamole


Birthday dinner with Dave this time! He doesn't like serious cooking (aka with recipes) very much but went all out for my birthday :). According to my Moosewood cookbook, tlayudas are tortillas baked or grilled with all sorts of toppings, like Mexican pizzas. There are a bunch of steps involved but, very tasty!

1 tbsp vegetable oil
3 garlic cloves, minced or pressed
1/2 cup diced onions
3/4 cup diced bell peppers
1/8 tsp salt
1 tsp ground cumin
1/4 tsp cayenne
1 15-oz can pinto beans (1/4 cup of liquid reserved)
2 whole grain tortillas (or 4 small ones)
1 cup grated sharp cheddar cheese
1 cup shredded green cabbage or slaw mix
1 cup diced fresh tomatoes
2 tbsp chopped fresh cilantro

Warm the oil in a skillet on medium heat. Add the garlic, onions, bell peppers, salt, cumin, and cayenne and cook, stirring often, until soft, about 10 minutes. Remove from the heat.

Drain the pinto beans, reserving about 1/4 cup of the liquid. In a food processor or blender, puree the beans, cooked onions and peppers, and just enough of the reserved bean liquid to make a thick, creamy spread. Add more salt and cayenne to taste.

Place the tortillas on an unoiled baking sheet. Spread each with half of the pureed beans (or 1/4 if you use 4 small tortillas) and top with cheese. In a preheated 450 degree oven, bake until the cheese melts, about 5 minutes. Spread 1/2 cup (or 1/4 cup for 4 tortillas) of the cabbage or slaw mix on each tortilla and bake for another 5 minutes. Toss the tomatoes with the cilantro and sprinkle on top of the cabbage. Bake for a couple of minutes, just until the tomatoes are hot.


Optional (but highly recommended!): Simple Guacamole

2 large ripe Haas avocados
2 tbsp lemon or lime juice
1/4 tsp salt
1.5 tbsp minced red onions (optional)
pinch of cayenne or dash of Tabasco or other hot pepper sauce (optional)

Slice lengthwise around each avocado down to the pit. Twist the halves apart, and remove the pit. Scoop out the flesh and mash it in a bowl. Stir in the lemon juice and salt, adding more to taste. Stir in the red onions and cayenne, if using. Serve immediately.


Both recipes from "Moosewood Restaurant Cooking for Health"

Lemon blueberry buckle


YUM. This makes me drool just looking at it. This was Dave's birthday "cake" for me - I picked it out instead of a cake because I thought it would be more interesting. And that it was. I normally don't like lemon-flavored desserts all that much but I loved this. I had also never made or even heard of a buckle before, but I'll definitely look for more recipes after this one! When we were making this, we were thinking that the lemon glaze for the top was unnecessary - but it IS necessary. Once it sits for a bit it gets crunchy and just awesome on the top. Just do it.


Crumb topping
1/2 cup flour
1/3 cup sugar
1/8 teaspoon salt
Zest of 1 lemon
1/4 cup (1/2 stick) butter, cubed, at room temperature

In a medium bowl, whisk together the flour, sugar, salt and lemon zest. Add the butter, using a fork or your fingers to cut in the butter until it is reduced to the size of peas. Loosely cover the bowl, and place it in the freezer while you mix the cake batter.

Cake and assembly
6 tablespoons butter, at room temperature, plus extra for greasing the pan
1 1/2 cups plus 2 tablespoons flour
1 teaspoon baking powder
1/4 teaspoon baking soda
1/2 teaspoon salt
1/4 teaspoon freshly grated nutmeg (I used dried nutmeg - it's a 1:1 ratio fresh to dried)
3/4 cup plus 1/3 cup sugar, divided
Zest of 1 lemon
2 eggs
1/2 cup buttermilk (or sour milk, milk + vinegar or lemon juice)
2 cups blueberries, fresh or frozen, divided
Crumb topping, chilled
Juice of 2 lemons (about 6 tablespoons)

Lightly grease a 9-inch square baking pan.

In a medium bowl, whisk together the flour, baking powder, baking soda, salt and nutmeg.

In the bowl of a stand mixer, or in a large bowl with a hand mixer, cream together the butter, three-fourths cup sugar and lemon zest until light and fluffy, 3 to 5 minutes. Add the eggs, one at a time, scraping down the sides of the bowl after each addition.

Stir the flour mixture into the bowl, a third at a time, alternating with the buttermilk, until both the flour mixture and buttermilk are evenly incorporated into the batter. Gently fold 1 cup of the blueberries into the batter.

Spread the batter into the prepared pan and distribute the remaining blueberries evenly over the top of the batter. Remove the crumb topping from the freezer and sprinkle it over the berries.

Bake the cake at 350 degrees until it is lightly golden and firm on top, and a toothpick inserted in the center comes out clean, 45 to 50 minutes. Rotate the pan halfway through for even baking.

While the cake is baking, make a lemon syrup: In a small saucepan, combine the remaining one-third cup sugar with the lemon juice and whisk until blended. Heat the pan over medium-low heat and cook, stirring occasionally, until the liquid thickens to a syrupy consistency, 6 to 8 minutes. (The glaze will bubble while cooking and may need to be removed from the heat to check that it is the proper consistency.) Remove from heat and set aside in a warm place.

Remove the cake from the oven and drizzle the warm glaze over. Cool to room temperature. The cake will keep at room temperature for 2 to 3 days, covered in plastic wrap (or in the fridge for a week or so).


Original recipe here


Birthday Dinner - Basho


Parent-sponsored birthday dinner at Basho = amazing sushi! One of the rolls in the photo was a summer roll that had a bunch fruit in it - was a little nervous about it but it was awesome. Great meal after an afternoon Red Sox game!

Wednesday, June 27, 2012

Raw Peppermint Patties


Well, it's been about a month and a half since my last post, and I'd like to say I have a good excuse but alas, I do not. Work has gotten busy, boyfriend is on "summer vacation" until medical school, etc, etc...and I'm just plain lazy?

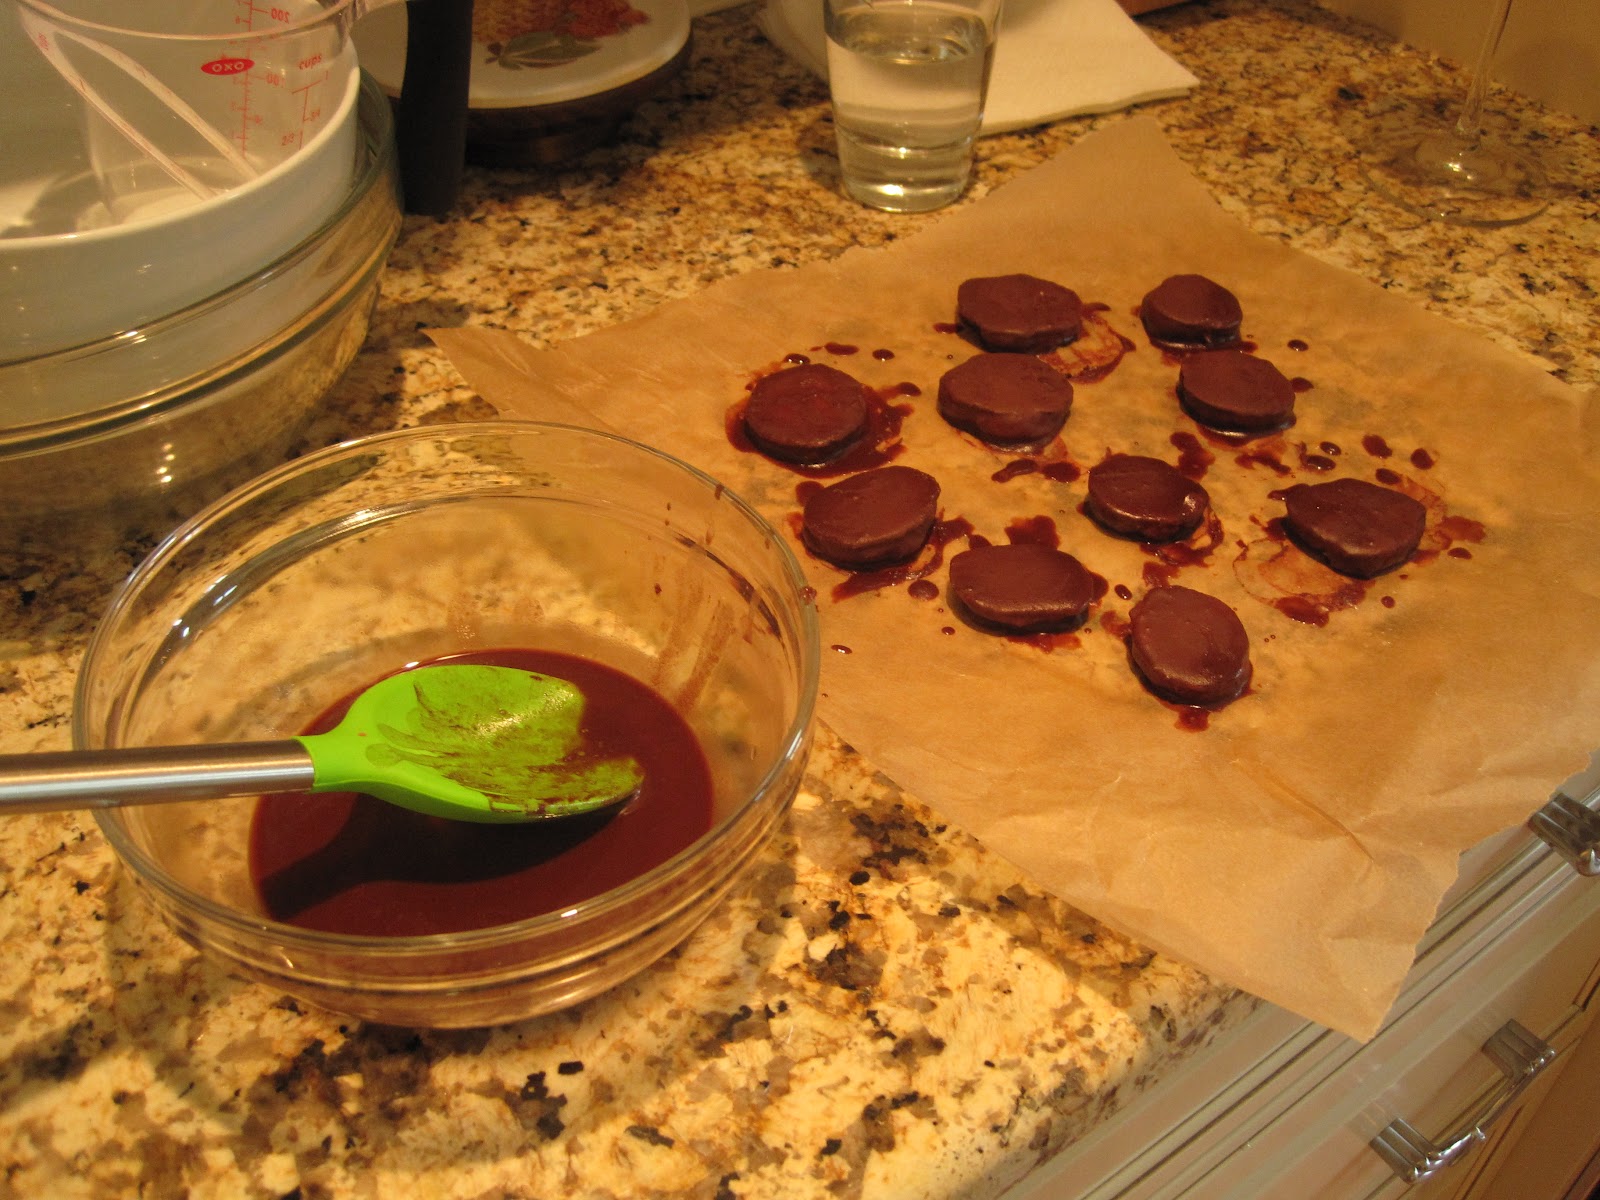
Anyway, I actually made these suckers on Mother's (...Mother's or Mothers'??) Day and am finally getting the post up. I saw this recipe on Tastespotting, I believe, and my mom LOVES York peppermint patties so I thought I'd give them a try. I was surprised to see how much coconut is involved (oil and shredded) - since you definitely don't taste any coconut in a peppermint patty! I had also never seen coconut oil before - so that was an interesting sight. Picked it up at Whole Foods with my sister, and both of our reactions were basically "EW."

Anyway, these weren't actually very hard in the end, and definitely an interesting endeavor. Highly recommend these!

1/2 batch of raw chocolate
1/4 cup cashews
1/4 cup shredded coconut
1/4 cup coconut oil
1 tbsp honey
1/4 tsp peppermint oil (OR peppermint extract)

In a food processor, grind cashews and shredded coconut together into a fine powder. Add coconut oil, peppermint oil, and honey, and pulse until combined - be careful not to over process! Place in refrigerator to set while you make the chocolate sauce, which will need to be warmed slightly inside a bowl of hot water to ensure a liquid consistency.

Once the cream has hardened, separate nine equal portions, which can then be shaped into patties with your hands (roll the cream into a ball and press it flat). Place patties in the freezer for 10 minutes or so.

When the patties are fairly cold, dip them one at a time into the chocolate sauce, which should harden immediately. I was able to dip each patty about three times before I ran out of chocolate.
 
(**NOTE: I stored mine in the freezer and they still melted on my fingertips when I took them out. This may have been because I couldn't find raw cacao powder for the raw chocolate and had to use regular cacao powder instead, but who knows. They taste pretty good cold anyway!)

Original recipe here